The other day I post this image on Instagram, and yep... most of my study break end up at something like that...
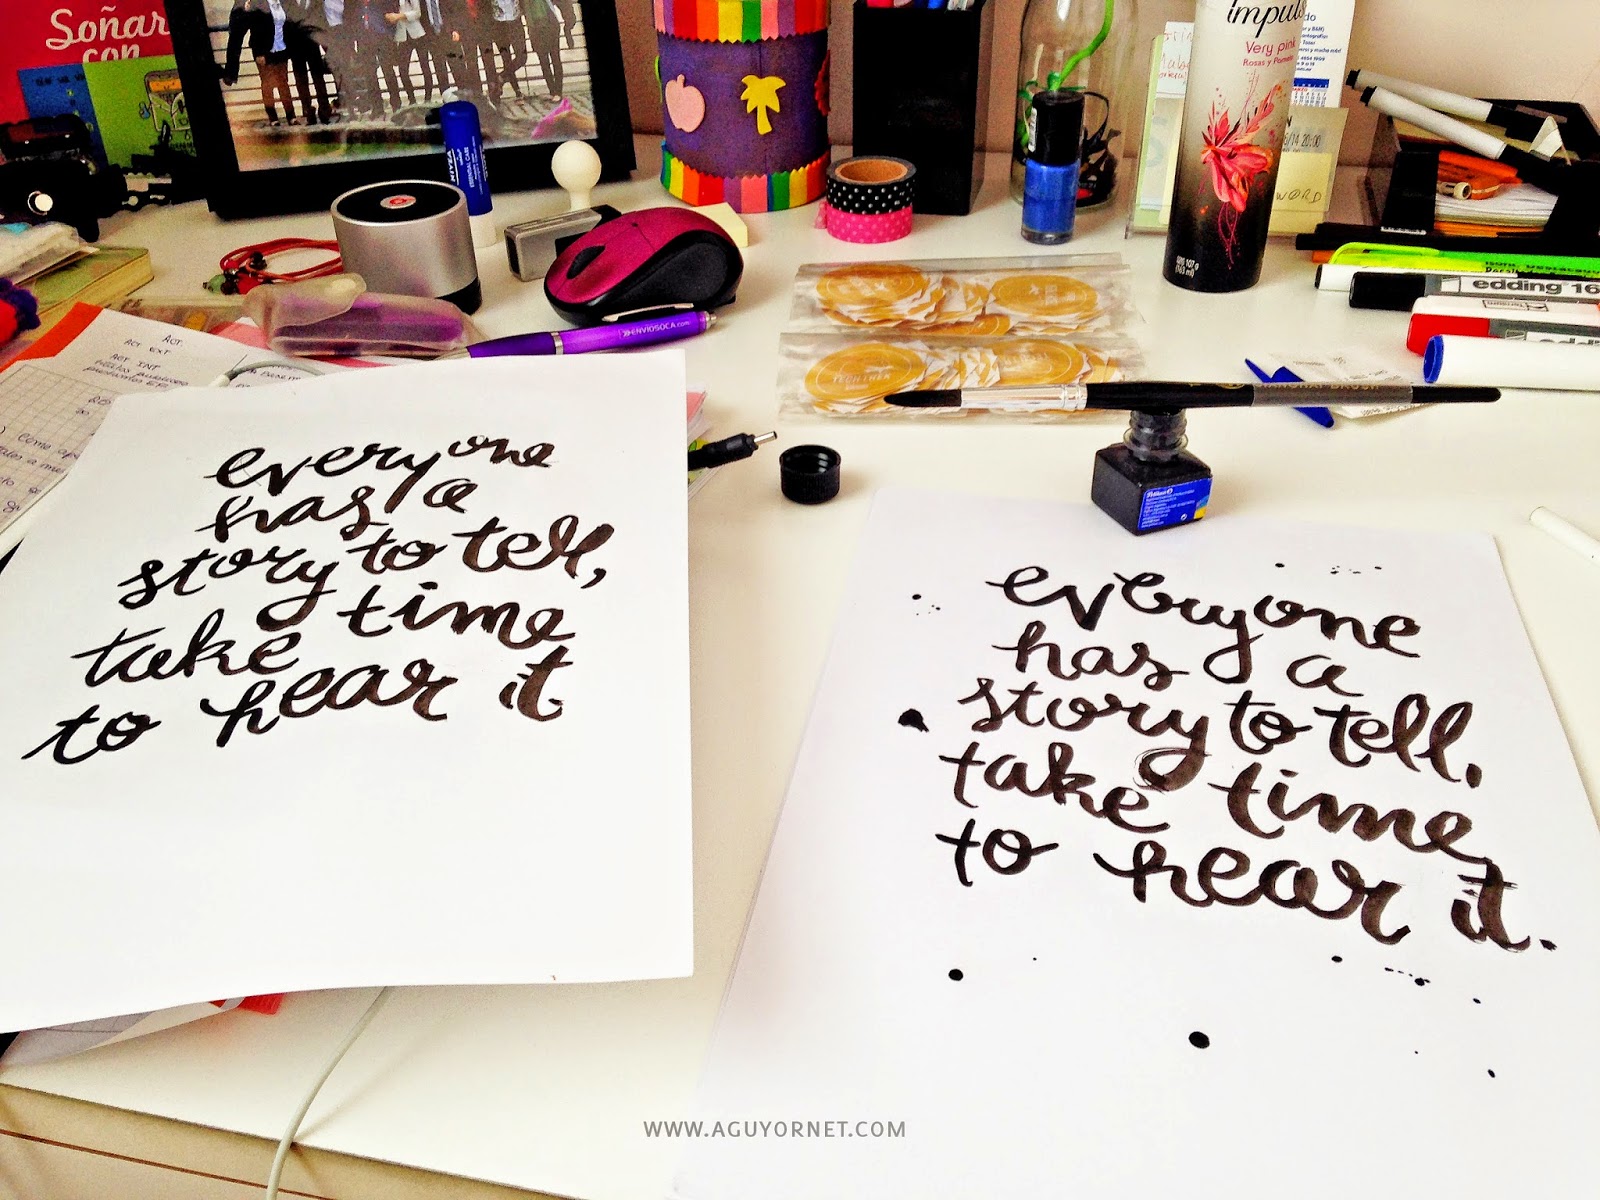
So one day I was really hurry for making a birthday gift I have in few days, I wanted to do something really representative... and I has this quote that I think really identify my friend and decided to make it into a poster...
Ultimamente he estado obsesionada con la caligrafía y debido que generalemente tengo poco tiempo durante el día porque me la paso todo el día en la facu o en casa estudiando, la caligrafía es de esas cosas tan lindas que requieren tan poco con un papel y una lapicera ...
El otro día publiqué esta foto en Instagram por ejemplo... sip... así terminan la mayoria de mis cuadernos cuando estudio jaja.
This is super easy and fast idea to make the perfect gift! The first thing you have to do is choose the quote you want and start writting in down, I use black ink and a brush, and regular paper. There is not much to explain here is just practice and do it over and over again until you like the result.
Esta es una idea super y fácil y sencilla para hacer un regalo, más que todo porque es super personalizable!
Lo primero que tienen que hacer es elegir la frase que quieren, y simplemente empezar a escribirla, yo use papel común de impresora, tinta china y un pincel. Y acá la verdad que no hay mucho para explicar es simplemente escribirlo una y otra vez hasta que estén satisfechas con el resultado...
 Here is when the magic happen, you scan both of the pages, and insert it into Adobe Illustrator. (If you have two pages you have to do it separately for both). First, you will need to create a new project at Illustrator with the size of your poster, and then go to, file> place> and select the image scanned. Once you have your image in Illustrator, selected and click on "Image Trace"
Acá es cuando la magia sucede! Una vez que lo scanean, abren Illustrator y crean un nuevo proyecto con el tamaño del poster, y después van a File > Place y seleccionan la imagen que acaban de escanear. Y este basicamente es un tutorial de como vectorizar imagenes, y porque es importante vectorizar se estarán preguntando! Pues la razón es que las imagenes vectorizadas no se pixelan, entonces si queremos imprimir con buena calidad y encima algo tan grande como un poster es más que esencial que este vectorizado!
Entonces una vez que tienen la imagen en illustrator hacen click en "Image Trace"
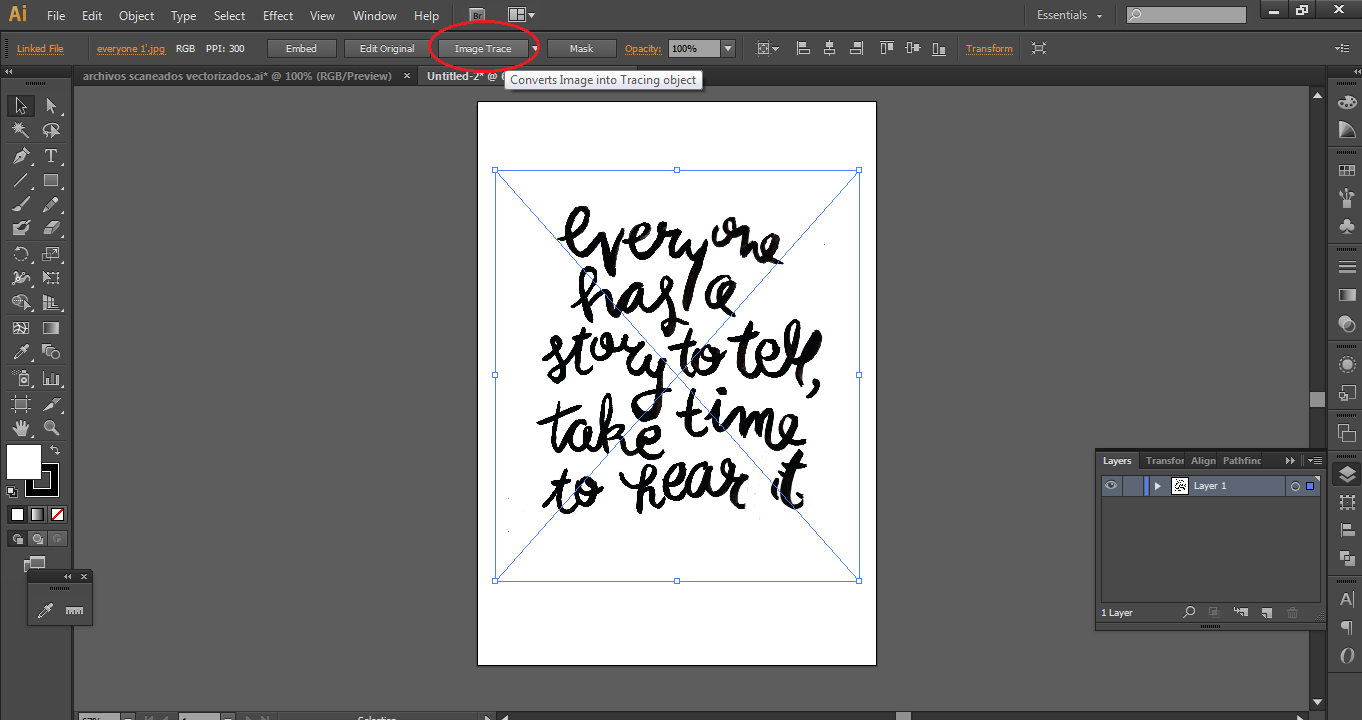
After that click on "Expand"
 Here is when the magic happen, you scan both of the pages, and insert it into Adobe Illustrator. (If you have two pages you have to do it separately for both). First, you will need to create a new project at Illustrator with the size of your poster, and then go to, file> place> and select the image scanned. Once you have your image in Illustrator, selected and click on "Image Trace"
 Acá es cuando la magia sucede! Una vez que lo scanean, abren Illustrator y crean un nuevo proyecto con el tamaño del poster, y después van a File > Place y seleccionan la imagen que acaban de escanear. Y este basicamente es un tutorial de como vectorizar imagenes, y porque es importante vectorizar se estarán preguntando! Pues la razón es que las imagenes vectorizadas no se pixelan, entonces si queremos imprimir con buena calidad y encima algo tan grande como un poster es más que esencial que este vectorizado!
Entonces una vez que tienen la imagen en illustrator hacen click en "Image Trace"

Después en "Expand"
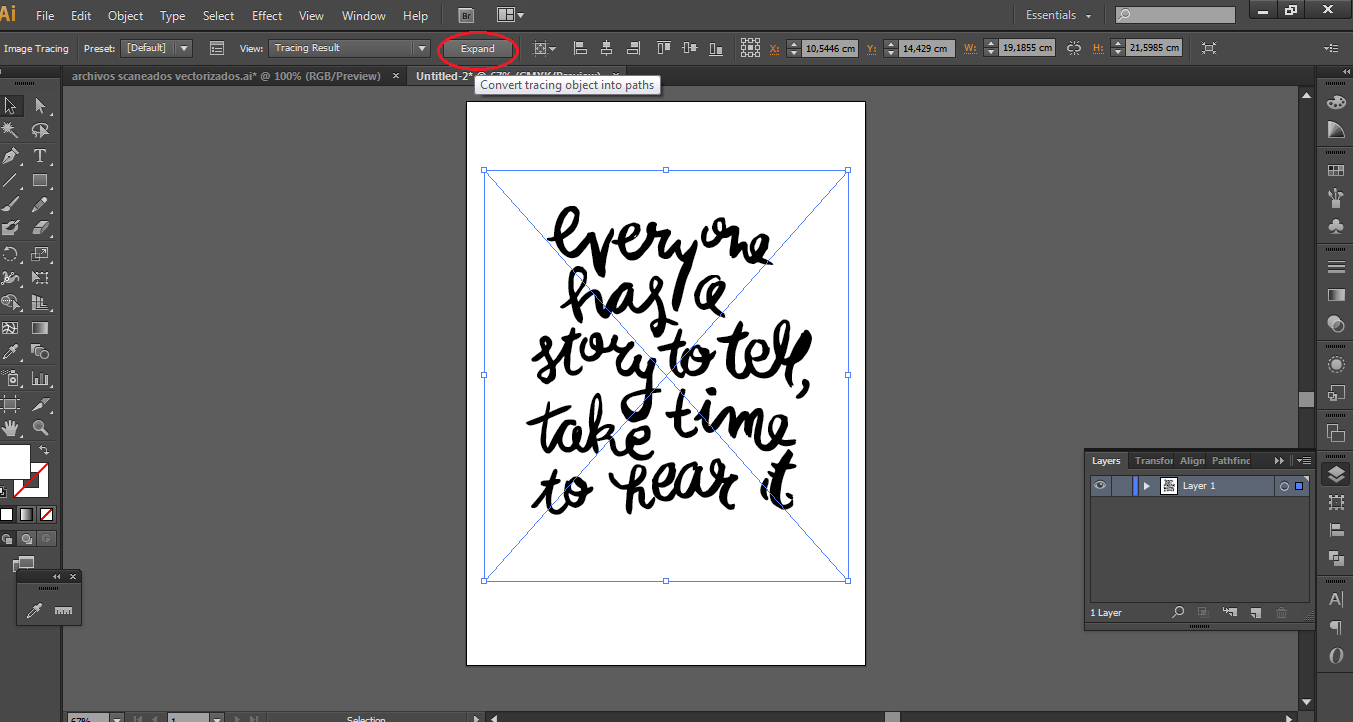
Your image should look something like this, now everything on the image you scanned is a vector, even the white space.

Your image should look something like this, now everything on the image you scanned is a vector, even the white space.
Su imagen se debería ver algo como esto, eso quiere decir que todo lo fue scaneado en esta imagen ahora esta vectorizado, incluso los espacios en blanco.
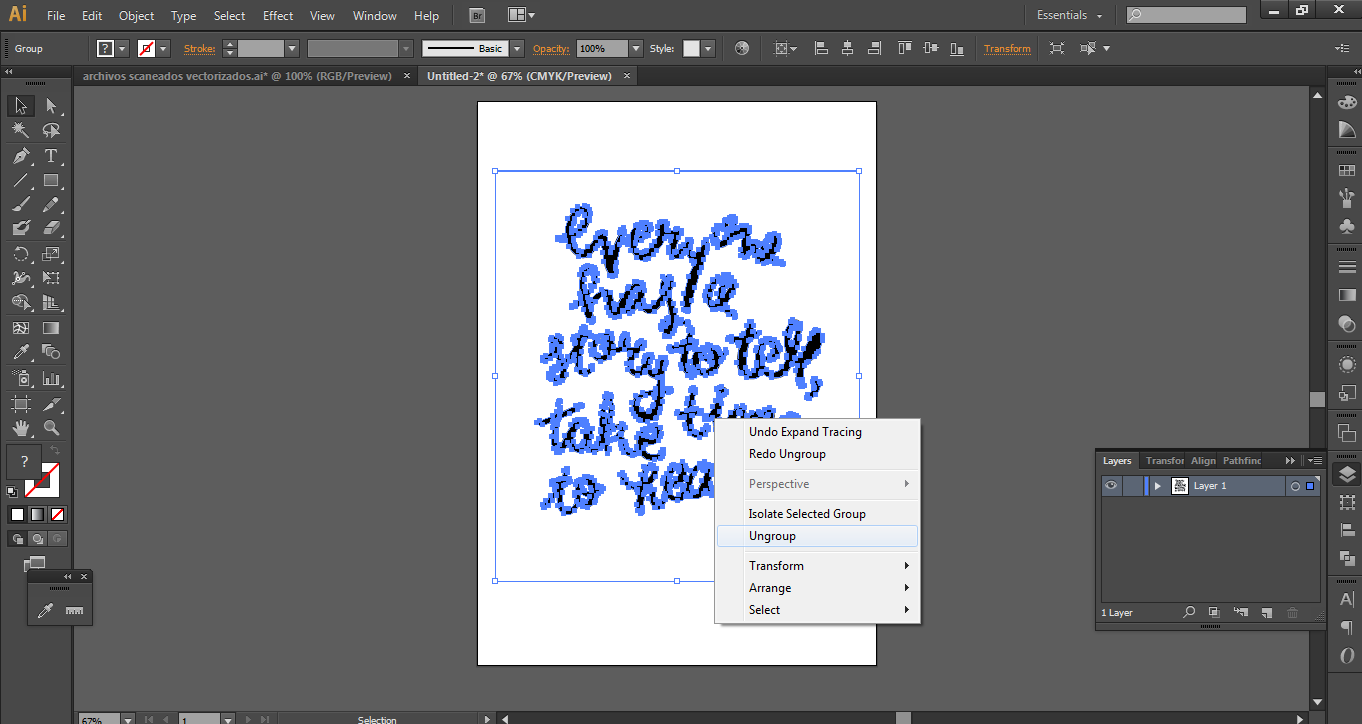
So as we don't need the white space, only the black words, we are going to ungroup it, and start selecting the white part we don't want and delete them
Pero como no queremos los espacios en blanco, seleccionamos, y con click derecho vamos a "Ungroup", y empezamos a seleccionar todas las partes blancas que queremos eliminar.
Now, we only have the words, you are free to do whathever you want, you can make it super big, change color, put and image under, once again the possibilities are endless!

Now, we only have the words, you are free to do whathever you want, you can make it super big, change color, put and image under, once again the possibilities are endless!
Ahora que solo tenemos las palabras sin fondo blanco, podemos hacer lo que queramos desde cambiarle el color hasta ponerle una imagen de fondo, etc.
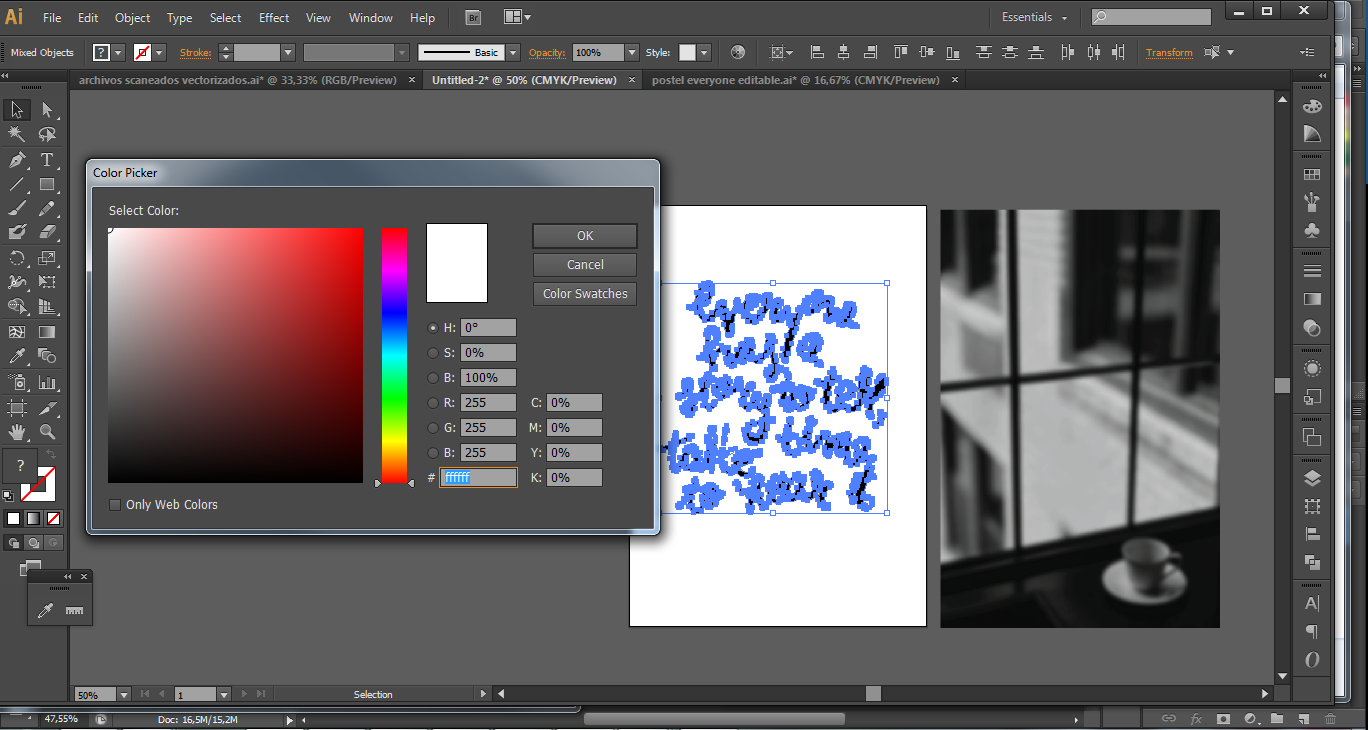
Una vez que esta listo es hora de guardarlo, van File> Save as> y lo guardan en PDF!! y es muy importante que sea pdf sino todo el vectorizado se pierde!
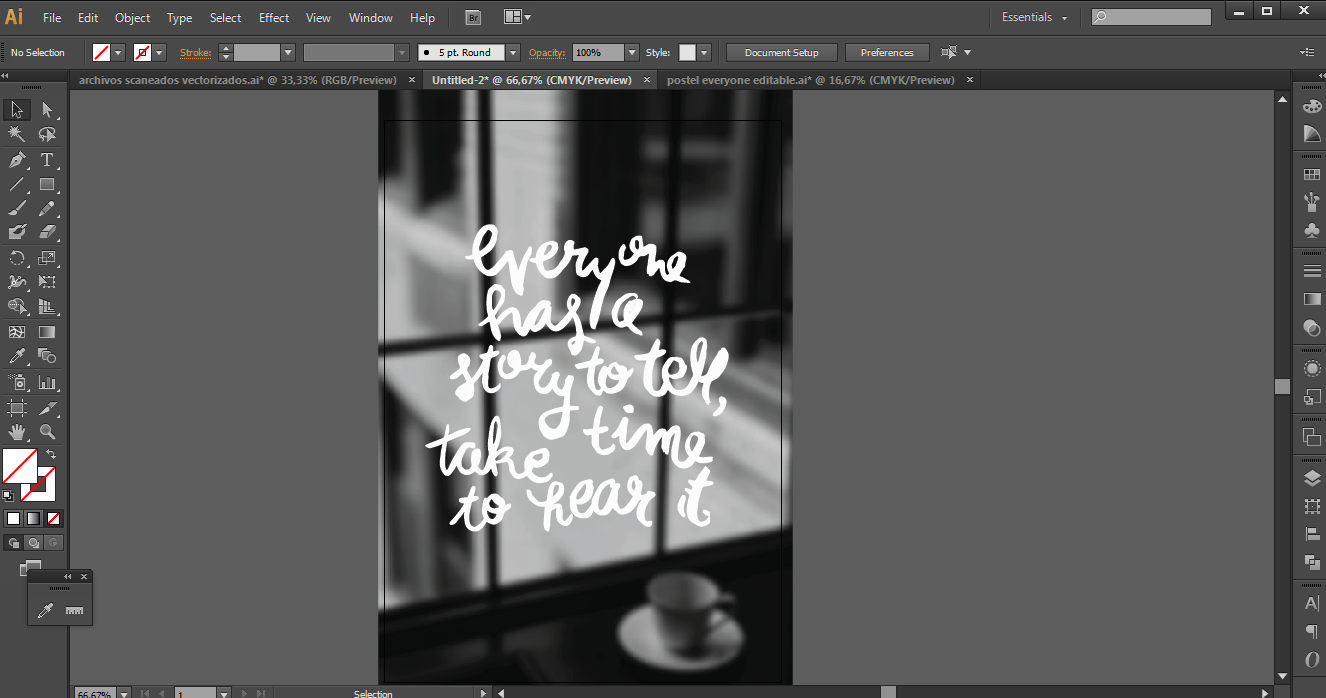
And you are ready to print!

Y ya esta listo para imprirse! Yo acá en Buenos Aires lo mandé a imprimir a Staples, si es blanco y negro te lo hacen en el momento!
I hope you liked the idea! and remember to share your projects in my facebook page :)
Love, Agus


 Cardmaking
 I'm Loving
 Christmas Season
 Personal
 Living in Buenos Aires
 Recipes
 Snail Mail


super que lindo... te cuento que a mi tambien me gusta la caligrafía... ;) feliz 2015...
ReplyDeleteAgus que lindo tutoríal, me encantan la caligrafía también, tengo que practicar :) . Feliz Año de nuevo.
ReplyDeleteI really love your quote and font! Would you mind sharing your vector file for us to add onto our own image?
ReplyDelete